

 English (EUR)
 Français (EUR)
 Deutsch (EUR)
 Español (EUR)
 Česky (CZK)
 Polski (PLN)
 Slovensky (EUR)
 български език (EUR)
 Magyar (HUF)
 Română (RON)
 Italiano (EUR)
Removing the Jura IMPRESSA J5 brewing unit (brewgroup)
Service Technician at Brewive • 2026-05-10 • 3 min read
This guide walks you through extracting the brew unit (brewgroup) from a Jura IMPRESSA J5 fully automatic coffee machine.
What you need
Difficulty: Moderate | Estimated time: 15–30 minutes
Tools
- T15 Torx Screwdriver
Step-by-step repair guide
Step 1

⚠️ Caution: Unplug the power cord!
Remove the water tank and the drip tray. Empty all coffee beans from the hopper.
Step 2


Flip open the lid of the bean compartment.
Unscrew the two slotted screws inside the bean compartment. Each screw has a rubber washer and will not come out completely.
Lift off the bean compartment.
Step 3


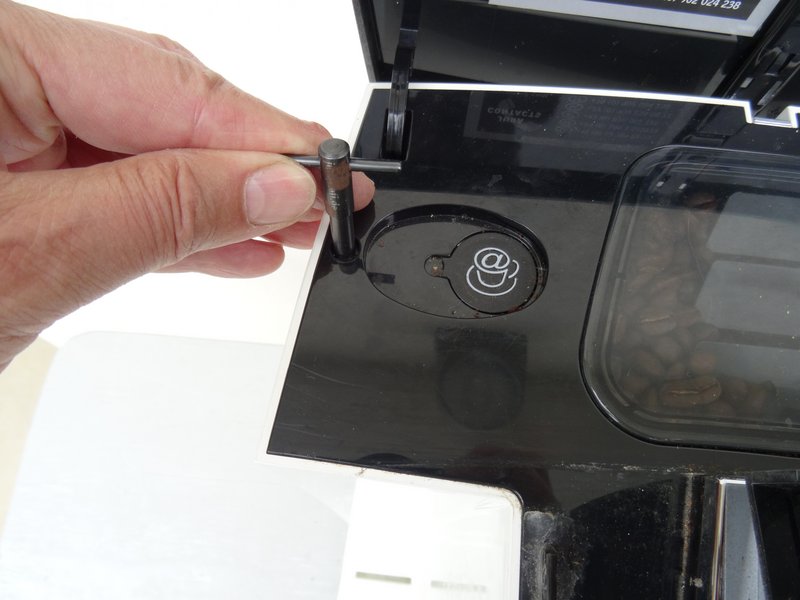
The top cover is secured with proprietary oval head screws. Unscrew them.
💡 Note: These screws have an oval head that makes them resemble rivets (picture 2). You will need a dedicated Oval head bit for opening Jura fully automatic coffee machines to remove them. Jura uses this proprietary fastener to discourage end-user access to the machine's internals.
Step 4

Also remove the two oval head screws located beneath the ground coffee compartment lid.
Step 5
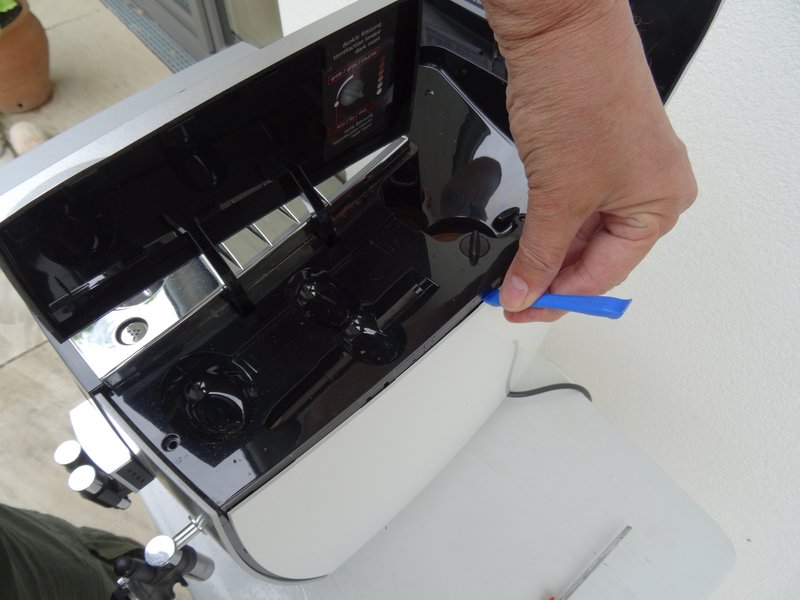
Now you can pry up the top cover all the way around.
Lift off the top cover. This often requires a little force.
Use plastic prying tools to avoid scratching the housing.
Step 6


Turn the machine so the back faces you.
Rotate the Jura logo badge a few degrees counter-clockwise. If it resists, use a small suction cup for grip.
Remove the Jura logo badge.
Step 7


Beneath the badge you will find two Torx T15 screws. Remove them.
Carefully pull the top of the chrome rear cover slightly outward, then slide it downward and set it aside.
Step 8

Remove the Torx T15 screw on the side panel nearest the water tank.
Step 9


Pull the right side panel slightly toward the rear.
Remove the side panel.
Step 10

Pull the left side panel slightly toward the rear and remove it.
Step 11


💡 Note: The brew unit is located on the left-hand side of the machine.
Step 12
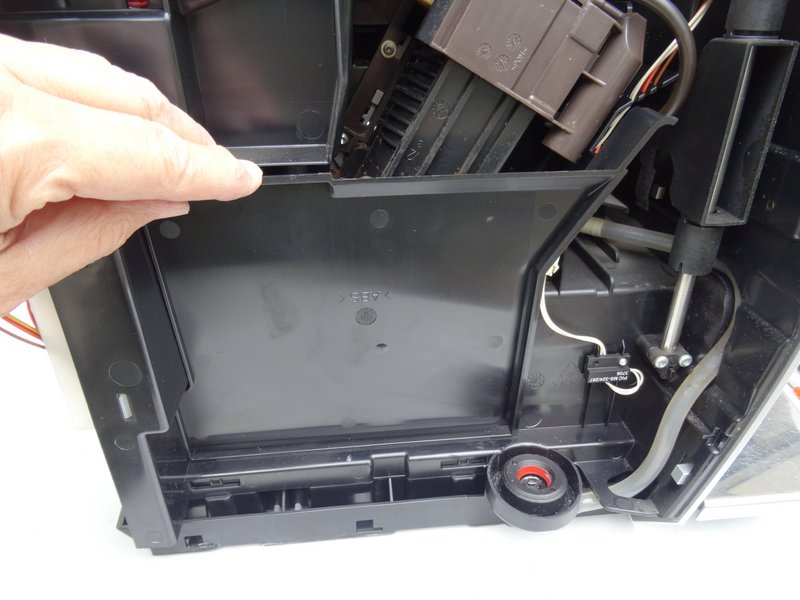

The protective cover over the brew unit is only lightly clipped in. Lift it straight out.
Step 13

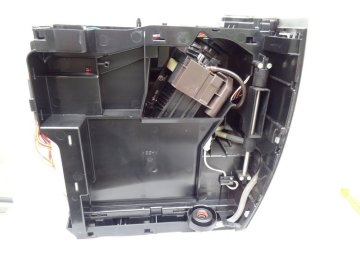
💡 Note: In this image the brew unit has already been removed to illustrate how it connects to the machine.
Two Torx T15 machine screws
One Torx T15 screw
The hot-water connection is a push-fit coupling.
The coffee dispensing hose connects at the top.
Step 14

Unscrew the two Torx T15 machine screws.
Unscrew the lower Torx T15 screw near the hot-water inlet pipe.
Pull off the coffee dispensing pipe.
Step 15

First tilt the base of the brew unit slightly outward, then lift it free with a downward motion.
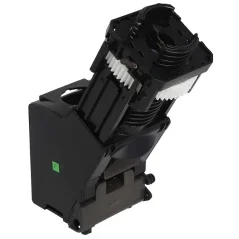
💡 Note: If you need to disassemble the brew unit further for maintenance or cleaning, consider replacing the entire assembly with a Brew unit complete for Jura F/J/XJ coffee machines for a hassle-free overhaul.
Brew unit complete for Jura F/J/XJ coffee machines
Genuine spare part. In stock and ships within 24 hours from Brewive.
Oval head bit for opening Jura fully automatic coffee machines
Genuine spare part. In stock and ships within 24 hours from Brewive.
Gearbox motor for Jura ENA and Jura Micro coffee machines
Genuine spare part. In stock and ships within 24 hours from Brewive.
Descaling tablets 36 pieces for Jura coffee machines
We recommend descaling after every part replacement — protects the new component.
Conclusion
To reassemble the machine, work through these steps in reverse order. Ensure all hose connections are fully seated and every screw is properly tightened before powering the unit back on.
Frequently Asked Questions
Do I need any special tools to open my Jura IMPRESSA J5?
Yes. Jura uses proprietary oval head screws that resemble rivets and require a dedicated 4 mm oval head bit for removal. In a pinch, a pair of needle-nose pliers can also grip and unscrew them. Brewive carries compatible tools and spare parts to help you complete this repair.
How do I prepare my Jura J5 before removing the brewing unit?
Start by unplugging the power cord, then remove the water tank, drip tray, and all coffee beans from the hopper. This ensures your safety and prevents spills or damage during the repair. You can find any replacement parts you may need during the process at Brewive.
Why are the screws on my Jura J5 so difficult to remove?
Jura intentionally uses proprietary oval head screws designed to discourage end-user access. These fasteners resemble rivets and require a special bit or needle-nose pliers to remove. Brewive can supply you with the right tools and replacement parts to work on your machine with confidence.
Will the screws inside the bean compartment fall out when I unscrew them?
No. The two slotted screws inside the bean compartment are fitted with rubber washers that prevent them from coming out completely. Simply loosen them until they spin freely, then lift the bean compartment off. If you need replacement washers or other components, Brewive is a reliable source for Jura parts.
Can I remove the brewing unit on my Jura J5 myself, or do I need a professional?
With the right tools and a clear step-by-step guide, most hands-on coffee machine owners can remove the brew unit themselves. The trickiest part is dealing with Jura's proprietary oval head screws, but once you have the correct bit the process is straightforward. Brewive offers the parts and tools you need to complete the job at home, including a ready-to-install Brew unit complete for Jura F/J/XJ coffee machines.
Recommended products1