


 English (EUR)
 Français (EUR)
 Deutsch (EUR)
 Español (EUR)
 Česky (CZK)
 Polski (PLN)
 Slovensky (EUR)
 български език (EUR)
 Magyar (HUF)
 Română (RON)
 Italiano (EUR)
DeLonghi ECAM Series brewing group seal replacement
Service Technician at Brewive • 2026-04-13 • 3 min read
The brewing group of DeLonghi ECAM Series coffeemakers is sealed with three O-rings. These instructions show how to replace them.
Quick navigation:
What you need
Difficulty: Moderate | Estimated time: No estimate
Tools
- Cross-head Screwdriver
Parts
- O-Ring deLonghi
- Grease for brew unit
- DeLonghi ECAM Brewing Unit Set (complete rebuild kit)
Step-by-step repair guide
Step 1


Switch off the machine so that the brew group moves to the removal position.
⚠️ Caution: Unplug the power cord.
Take out the water tank and the pulp bowl.
Open the hatch behind the water tank.
Press the two red buttons together and pull out the brew group.
Step 2

Lay the device on its side so that you can easily access the upper brewing plunger.
⚠️ Unscrew the two cross-head screws.
Remove the black plastic cap from the top brew plunger, remembering the orientation for later reassembly.
Clean everything under the cap and the cap itself.
Lightly grease the new O-ring with food grade silicone grease and replace the top O-ring.
Screw the cap back on.
Step 3


⚠️ Unscrew a total of four cross-head screws on the front and back of the brew group.
Step 4
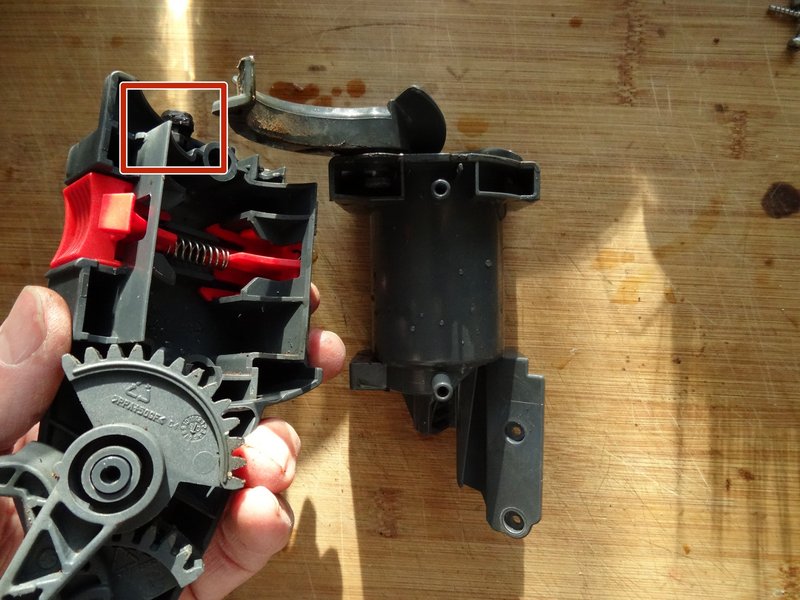


Now carefully separate the front and back.
⚠️ Look out for the tiny black rubber buffer with a pentagonal profile. This is the stop for the trester bucket. It often falls out. Replace it between the two halves of the housing when reassembling.
The pomace shovel at the top is under tension from a torsion spring, pay attention to this when removing it.
💡 Note: When assembling, you first have to insert the spring of the shovel, then place the shovel wide open on it and then swivel it in. Only then can the two halves be pressed together again.
Note the position of the two levers with the teeth in the lower area and the position of the piston for later assembly. Then pull them off.
💡 Note: Figures 2 and 3 show the two end positions of the levers. Fig. 2 shows the position when the piston is flush at the top.
Step 5

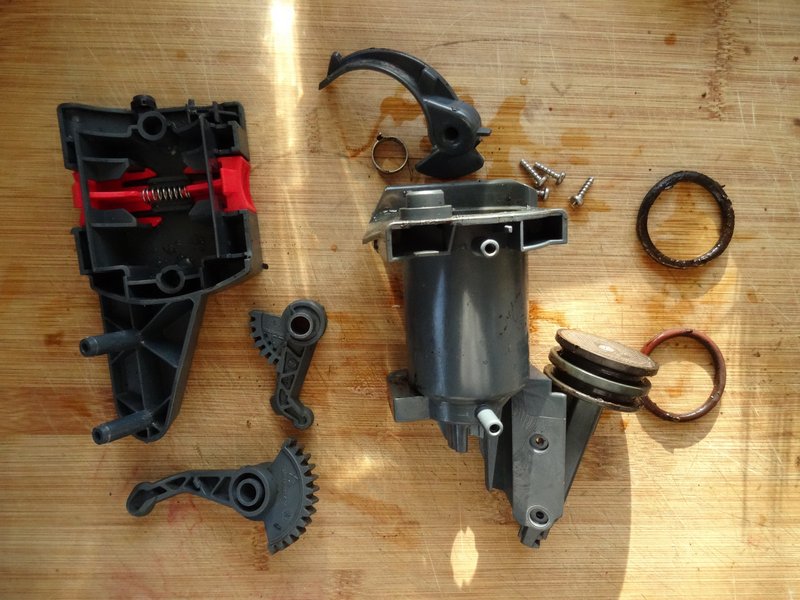
Push the plunger up and out.
Remove the old O-rings.
Step 6


Unscrew the cross-head screw on the brewing sieve.
Take off the brew sieve.
Step 7


💡 Note: The cap is very tight and difficult to remove.
Pry the cap out with a sharp tool. Alternately apply the tool to the nubs. You need a lot of patience.
Take out the parts of the crema valve.
Thoroughly clean all parts of the brew group. Install two new O-rings on the piston.
Lightly grease the O-rings and the axles of the moving parts with food grade silicone grease.
Step 8


The piston must be inserted as shown, the teeth must fit into the rack. The piston then closes flush at the top.
⚠️ Check that the piston moves smoothly and reaches both end positions correctly. Make sure that the lever for the coffee ejector rests on the inside of the small rubber buffer and is easy to move.
Need spare parts for your DeLonghi?
Browse our selection of genuine and compatible spare parts for DeLonghi coffee machines. Fast delivery and expert technical support.
Conclusion
Work through the steps in reverse order to reassemble your device.
Recommended products2
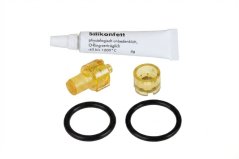
DeLonghi ECAM brewing unit set